
Rust Damage on Trucks: What to Look For (And Why to Fix It Fast)
Share
Why Rust Can’t Wait
Rust never sleeps—and it’s always worse than it looks. What starts as a tiny bubble in the paint can spread inside rocker panels, cab corners, and floors, weakening structure, failing inspections, and tanking resale value. Fixing rust early:
-
Saves money vs. larger metal replacement later
-
Protects safety—rockers and floors are structural
-
Prevents spread to pillars, mounts, and seams
-
Keeps water out to avoid mold, electrical issues, and soft floors
Step 1: Smart Assessment (Visual + Magnet)
We start with a thorough visual inspection, then confirm with magnetic checks to find hidden filler or thin metal.
What to check first
-
Outer rocker panels: If you see paint bubbling, assume corrosion started from the inside out. Catching it now often lets us clean and preserve inner rockers and floors before they’re too far gone.
-
Cab corners: Look for bubbles, swelling seams, or trapped dirt at the lower rear of the cab.
-
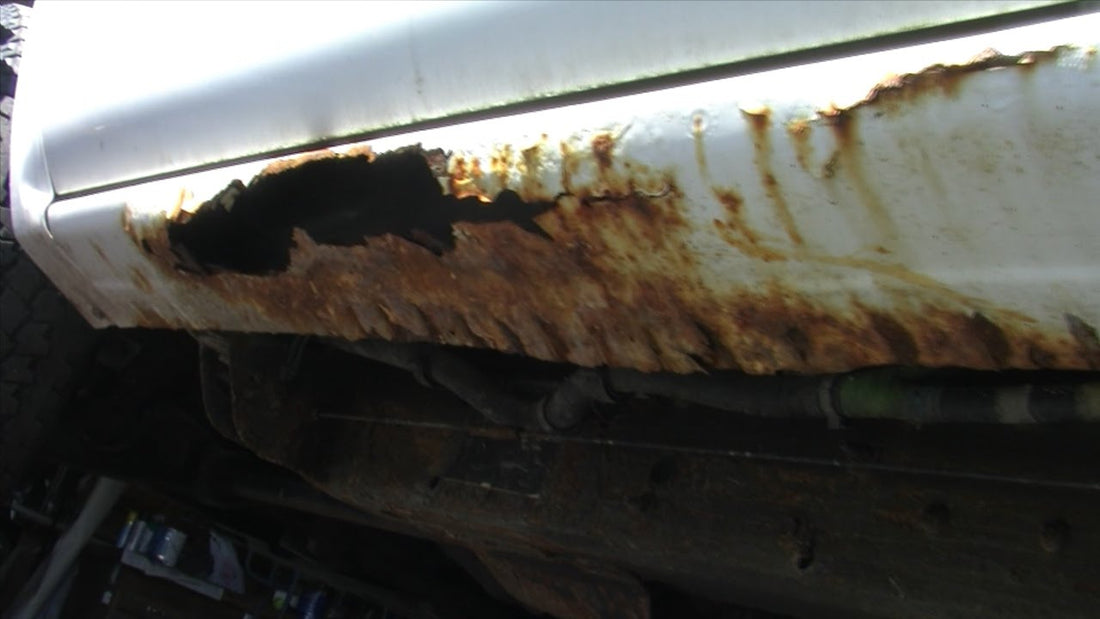
Underbody view: Get underneath and look back along the inner rockers. Surface rust may clean up; scaling and layered flake usually means metal loss.
-
Floorboards (especially seams): Pay close attention where floors meet rockers and at the inner cab corners—these seams trap moisture.
-
Magnet test: A weak or “sticky” magnet can indicate filler over thin metal or perforation.
Rule of thumb: Surface rust = may clean and treat. Bubbling/scale = inside-out corrosion → metal replacement is typically the right repair.
Safety note: If you’re inspecting at home, use eye protection, a stable jack/stands, and good lighting.
Step 2: Plan the Repair
After visual and magnetic checks, we map out the repair:
-
Define cut lines in solid metal, not in the rust zone
-
Order correct panels (outer rockers, inner rockers, cab corners, floor patches as needed)
-
Protect interior (seats, carpet, electronics) before cutting/grinding
Step 3: Disassembly & Rust Exposure
With trim and panels removed, you finally see the true extent.
-
Remove the outer rocker and/or cab corner to expose inners and floor edges.
-
Wire-wheel, scrape, and vacuum to remove scale so the real metal condition is visible.
Step 4: Rust Removal & Metal Prep (No Shortcuts)
It’s imperative to remove or neutralize rust before any new metal goes on. We use a combination of:
-
Sand blasting (targeted)
-
Grinding/Sanding to bright metal
-
Acid-etch/chemical prep where appropriate (neutralized per spec)
Once clean, we treat bare steel with epoxy primers for maximum adhesion and corrosion resistance.
Step 5: Fitment, Welding & Corrosion Control
-
Test-fit replacement panels and confirm gaps/contours.
-
Use weld-through primers at seams—these are designed to shrink when welded and protect overlapped metal so there’s no bare steel left hidden.
-
Weld panels in short, controlled passes to manage heat and prevent distortion.
-
Dress welds, then seal seams.
Cavity protection (critical!): After welding, we fog the internal cavities (rockers, cab corners, seams) with a rust-preventative coating/wax so moisture can’t attack from the inside again.
Step 6: Exterior Finish
-
Epoxy primer on repaired areas
-
Bodywork to refine surfaces
-
High-build prime, seal, and paint to OEM-level appearance
-
Optional: Undercoating/inside-frame treatment for long-term protection (highly recommended for CT winters)
Quick Checklist You Can Use (or Screenshot)
-
☐ Outer rockers: bubbles, chips, swelling
-
☐ Inner rockers (from underneath): scaling or flake
-
☐ Cab corners: lower seams and backside
-
☐ Floor seams to rockers: soft spots, perforation
-
☐ Magnet test: weak hold = thin/filler
-
☐ Plan: panels, cut lines in solid metal
-
☐ After repair: cavity spray + underbody protection
When Is Metal Replacement the Right Call?
-
Bubbling, blistering, or perforation in rockers/corners
-
Layered scale that returns after grinding
-
Soft floors or seam separation
In these cases, replacing metal is the correct, long-lasting fix vs. patching over compromised steel.
Common Red Flags on 90s–2000s Trucks
-
Rocker panel bubbles near front/rear door seams
-
Cab corner swelling at the very bottom radius
-
Floor pan rust where sound deadener traps moisture
-
Drains clogged by sand/salt, especially in New England winters
Image Ideas (for Your Step-by-Step)
Use these as captions/alt-text to help SEO:
-
“Paint bubbling on outer rocker—early sign of inner corrosion.”
-
“Magnet check along rocker: weak hold over filler vs. solid metal.”
-
“Inner rocker view from underneath showing scale.”
-
“Cutting to solid metal—marked repair lines.”
-
“Epoxy-primed metal prior to panel install.”
-
“Weld-through primer applied to seams before welding.”
-
“Cavity wax treatment inside new rocker panel.”
-
“Finished rocker and cab corner—epoxy, prime, paint.”
Prevent It From Coming Back
-
Keep drain holes clear in rockers/corners
-
Wash underbody after storms (road salt = enemy #1)
-
Add annual cavity fogging and undercoating for New England climates
-
Fix chips promptly; bare metal + salt = fast rust
Ready to Restore Your Truck?
At DSD Motorsports & Resto Mod Garage, we combine visual + magnetic inspections, correct metal replacement, and professional primers/sealers to stop rust the right way and keep it from coming back.
One Shop with Infinite Possibilities.
Restore. Customize. Live the Dream.
📞 860-894-6101
🌐 www.dsdmotorsportsgarage.com
Serving Central Connecticut and surrounding areas.